
Off-Grid Solar Setup: Step-by-Step DIY Guide With Diagram and Pictures
Last checked · JH Solar guide
An off-grid solar setup runs your lights, fans, phone chargers and a small fridge from panels and a battery, with no connection to Meralco or your electric cooperative. It is the one kind of solar system a careful DIYer can wire on the DC side, which is why it is popular for nipa huts, farms, rest houses and brownout corners at home.
This guide walks you through a small 12 V or 24 V system: the diagram, a parts list with the sizing rule for each part, a worked example, the wiring order with pictures, fuse placement, testing and maintenance. It also tells you clearly where to stop and call a licensed electrician.
What an off-grid solar setup is, and who it suits
In an off-grid solar setup, everything you use comes from the panels and the battery. During the day the panels charge the battery through a charge controller. At night, and on cloudy days, an inverter turns battery power into normal AC for your loads. If the battery runs low, the power stops until the sun comes back.
People look for this setup for three reasons: a place with no power line, frequent brownouts at home, or the wish to learn solar hands-on on a small budget. If you just want portable power for a few devices, a power station with a solar panel may be simpler, since the controller, battery and inverter come in one box.
The benefits are independence from the grid, no utility paperwork, and parts you can understand. The weaknesses: capacity is limited by the battery, several cloudy days can drain it, and an off-grid solar setup is not designed to run an aircon or a whole house.
The off-grid solar setup diagram
Here is the layout this guide follows. Orange lines are DC, navy lines are AC, and the green dashed line is grounding. If any symbol is new to you, our solar setup diagram hub explains each part and the color key in detail.
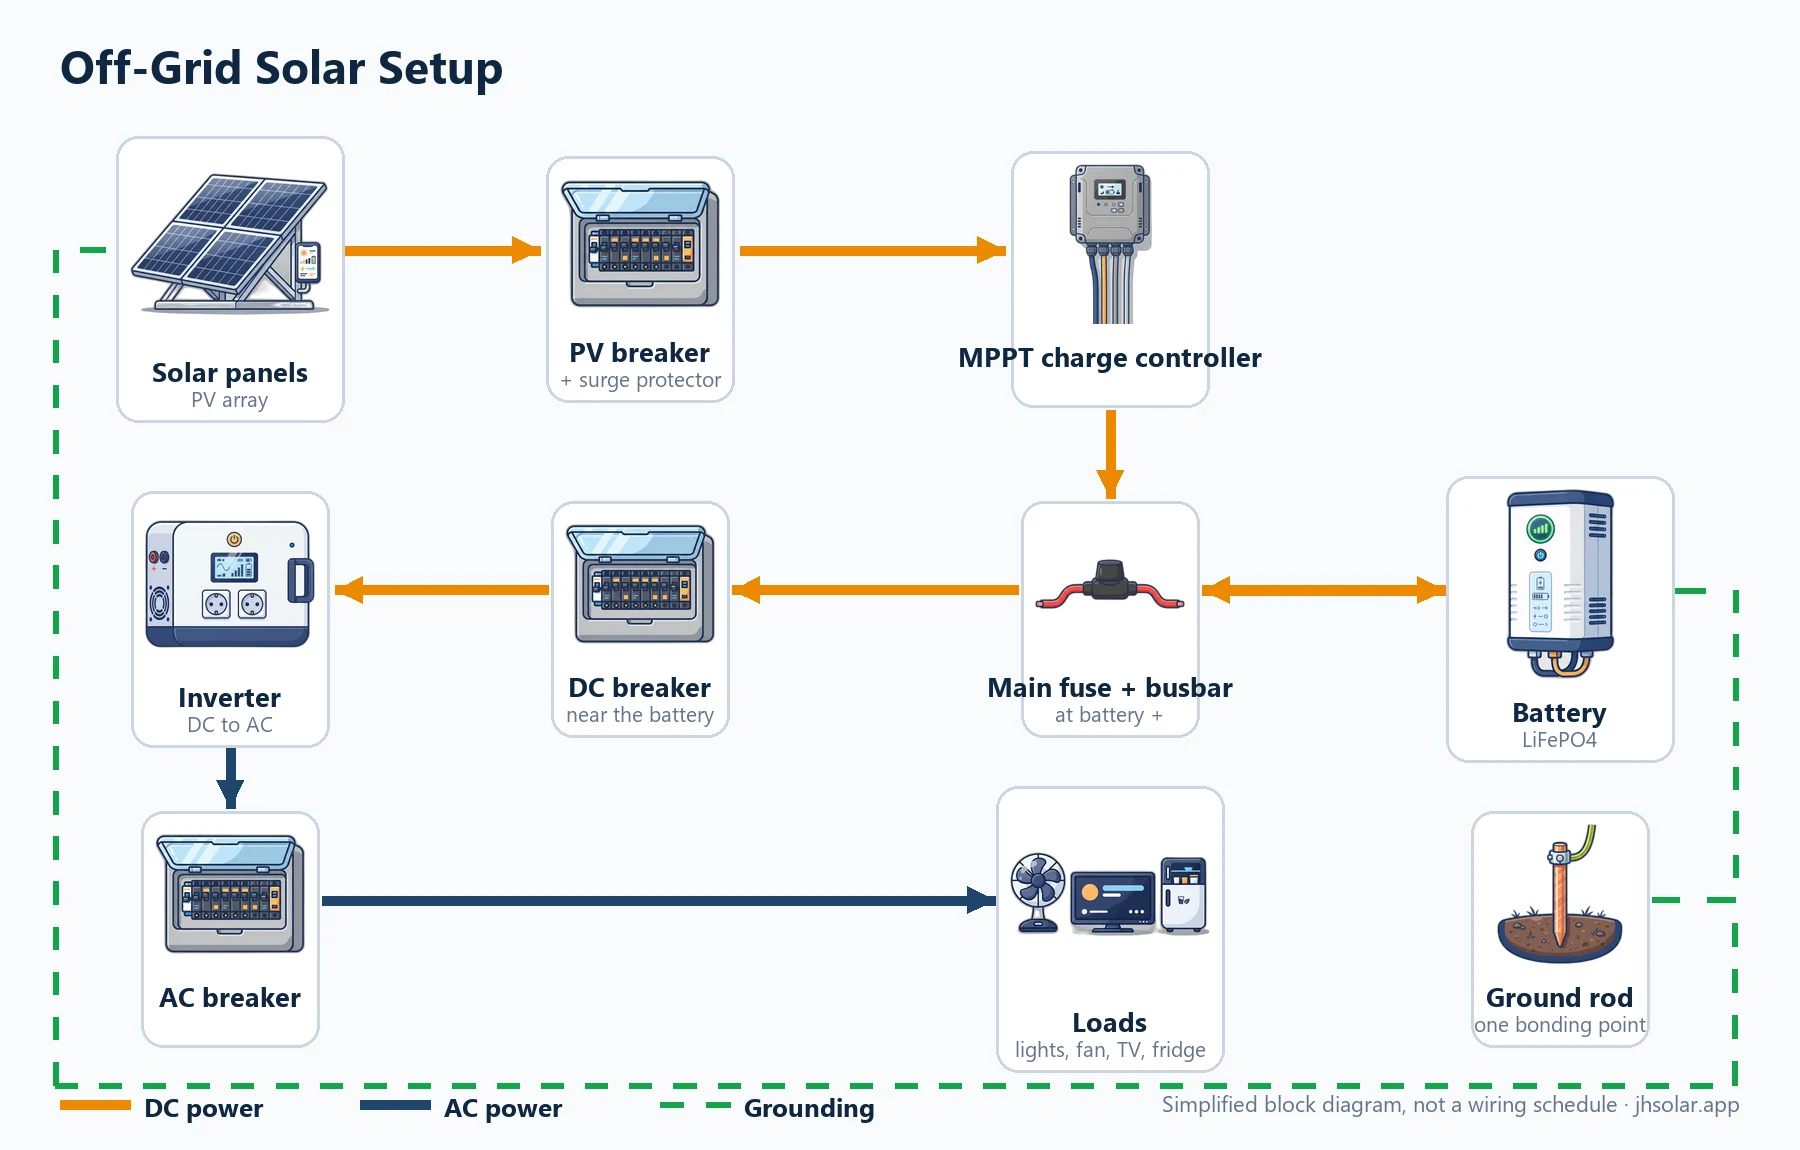
Solar panels feed a PV breaker, then an MPPT charge controller. The controller and the inverter both connect to the battery through one main fuse and busbar at the battery positive; the inverter branch also has a DC breaker near the battery. The inverter feeds an AC breaker and the household loads. The panel frames, controller, inverter and battery bond to a grounding rod.
Parts list for an off-grid solar setup, with the sizing rule for each
Do not buy by price or by the biggest number on the box. Each part has a sizing rule tied to your loads; the example column uses the worked example below.
| Part | Sizing rule | Example result |
|---|---|---|
| Solar panels | Array kWp = daily kWh ÷ (peak sun hours × 0.75). Panels = kWp ÷ panel kW, round up. | 3 panels of 400 W (example, rainy-season sizing) |
| PV breaker and surge protector | DC-rated; voltage above the cold-morning string voltage; current per the manual. | One of each at the controller input |
| MPPT charge controller | Charge current at least array watts ÷ battery volts; PV voltage limit above the cold string voltage. | At least 50 A, 24 V battery |
| Battery (LiFePO4) | Nominal kWh = kWh you need from it ÷ (0.80 usable × 0.90 efficiency). Ah = Wh ÷ battery volts. | 24 V, at least 134 Ah for one day |
| Battery fuse | DC-rated, sized to protect the battery cable, close to the battery positive. Every cable that leaves the battery needs one. | Per the manuals |
| Inverter | Continuous watts above the highest load at once; surge covers motor start; input voltage equals battery voltage. | 24 V input, about 1,000 W |
| DC breaker (inverter) | Rated for the maximum DC input current in the inverter manual. Rough check: inverter W ÷ battery V ÷ efficiency. | About 46 A for 1,000 W at 24 V and 90% efficiency; higher when the battery is low |
| AC breaker | Protects the inverter output cable; rating from the inverter manual. | One breaker on the AC output |
| Cables and lugs | By current and length, from the maker tables. | See the cable section |
| Ground rod and bonding wire | Bond every frame, rack and case to one point. | One rod |
Use your own loads and the ratings in your equipment manuals.
LiFePO4 is the common chemistry for home solar batteries because it handles deeper daily cycling than lead-acid and usually comes with a built-in BMS. You can read more about lithium iron phosphate batteries or compare options in our solar battery guide.
Worked sizing example for a small off-grid solar setup
Example only: a farm rest house with lights, fans, phone charging and a small fridge, using the same method as our solar computation calculator.
| Load | Watts | Hours per day | Watt-hours (W × h) |
|---|---|---|---|
| 4 LED bulbs | 4 × 10 W = 40 W | 6 | 240 Wh |
| 2 electric fans | 2 × 50 W = 100 W | 8 | 800 Wh |
| Phone charging | 4 × 10 W = 40 W | 2 | 80 Wh |
| Small fridge (average while cycling) | 50 W average | 24 | 1,200 Wh |
| Total | 2,320 Wh = 2.32 kWh per day |
Example figures. A fridge cycles on and off, so measure it or use its energy label.
- Battery. To cover one full day: 2.32 ÷ (0.80 × 0.90) = 3.22 kWh nominal. At 24 V, that is 3,222 ÷ 24 ≈ 134 Ah, so choose the next size up. For two cloudy days, double it to about 6.44 kWh.
- Panels. At 4 peak sun hours: 2.32 ÷ (4 × 0.75) = 0.77 kWp. With 400 W panels: 0.77 ÷ 0.40 = 1.93, round up to 2. At a rainy-season 3.5 hours: 2.32 ÷ (3.5 × 0.75) = 0.88 kWp, or 2.21 panels, so 3. The 400 W panel is only an example; our calculator starts at 620 W, which you can change.
- Charge controller. 3 × 400 W = 1,200 W ÷ 24 V = 50 A, so pick an MPPT rated for at least that and check its PV voltage limit against the panel datasheet.
- Inverter. Highest load at once: 40 + 100 + 40 + 100 W (fridge compressor running) = 280 W. A 1,000 W pure sine wave inverter leaves room, but confirm its surge rating covers the fridge start. Our solar inverter guide explains continuous and surge ratings.
Why 24 V and not 12 V? The same power at twice the voltage needs half the current, so the cables, fuses and breakers in an off-grid solar setup can be smaller and stay cooler.
Off-grid solar setup wiring order, step by step with pictures
The order matters as much as the parts. Keep every breaker open until the step that closes it, and do not skip the multimeter checks. Our panel mounting and installation guide has more on roof and rack mounting.
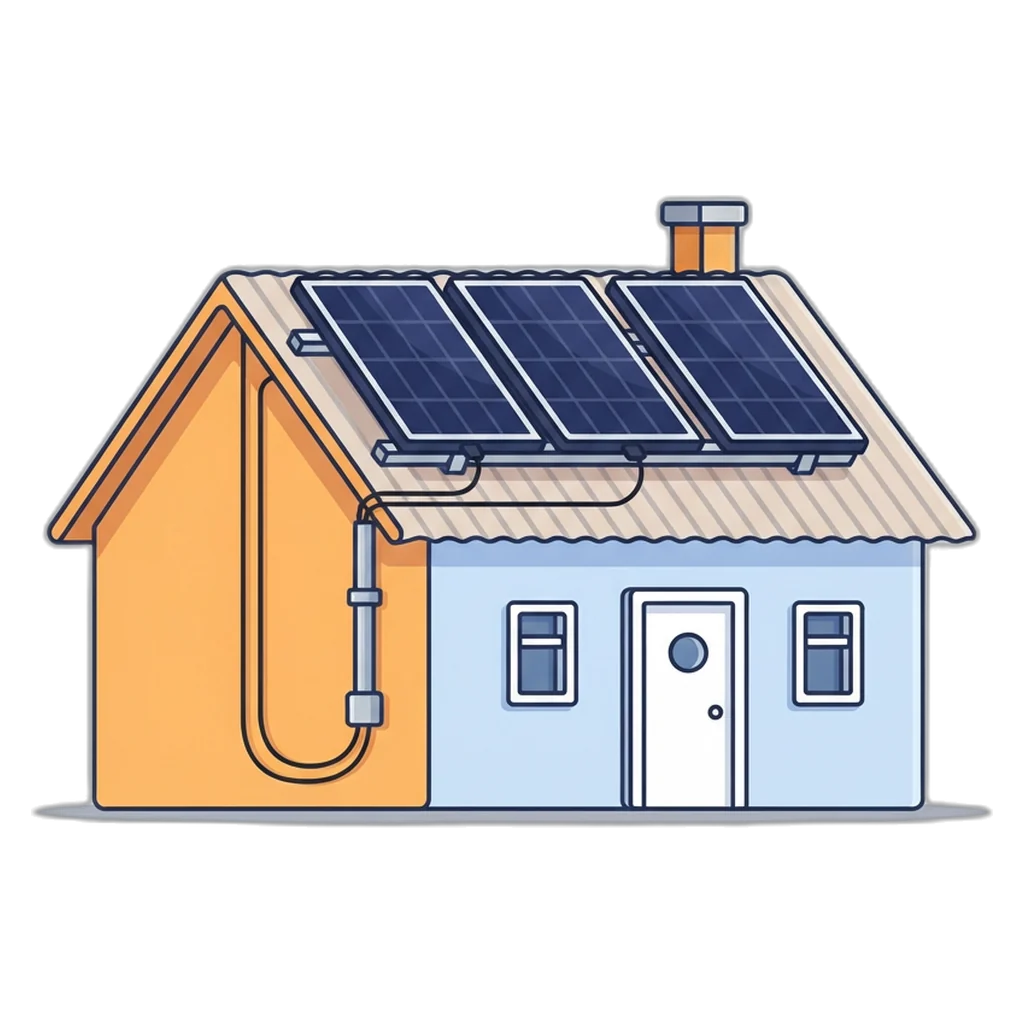
Step 1: Mount the panels and cover them
Bolt the panels to a solid rack with the clamps the rack maker specifies. Cover them with a tarp: panels make voltage as soon as light hits them.
Step 2: Mount the controller, inverter and battery
Fix the controller and inverter to a wall in shade, with the clearance the manuals ask for. Place the battery close by, off the floor and away from water, so battery cables stay short. Mount the breakers and fuse holder, all switched off.
Step 3: Ground and bond before anything carries power
Bond each panel frame, the rack, and the controller and inverter grounding points to the ground rod, as the manuals show. Do this now, before any wire carries power.
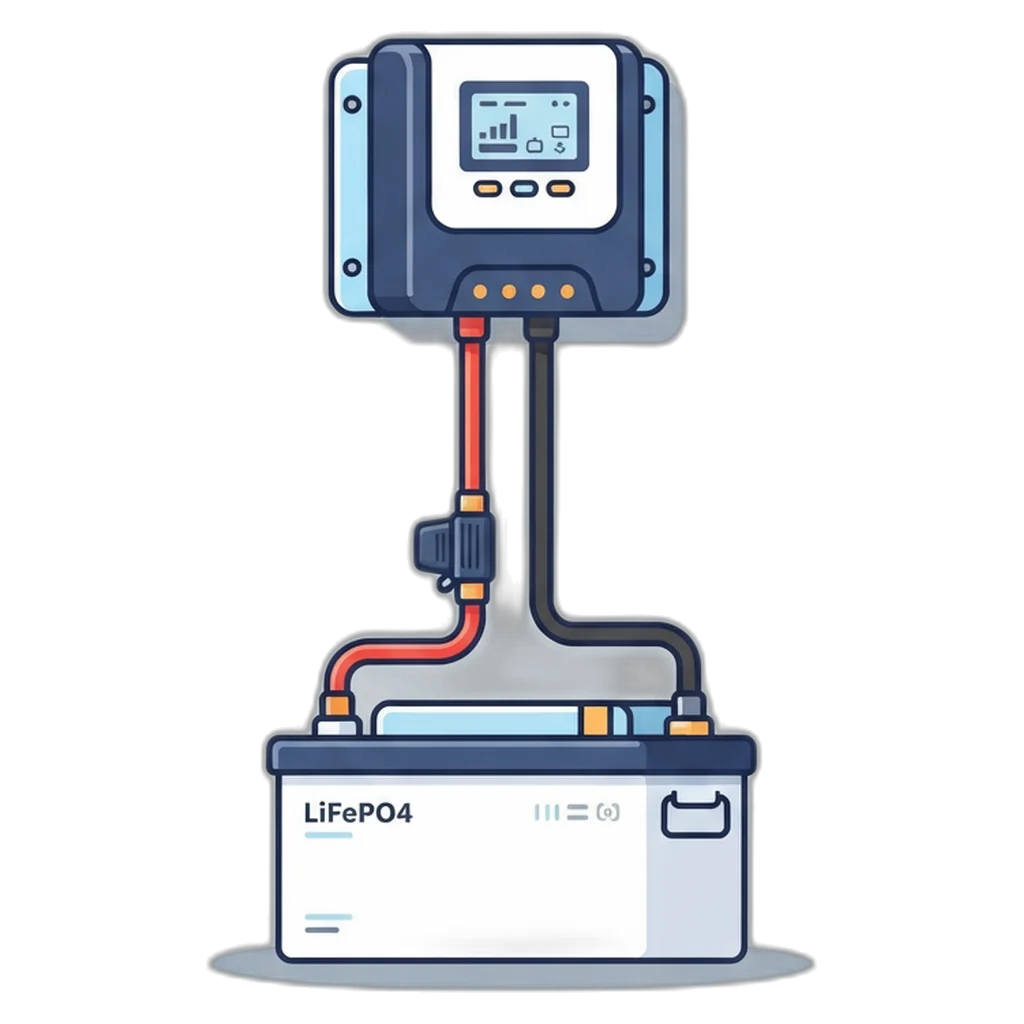
Step 4: Fit the battery fuse, then connect the battery to the controller FIRST
Fit the fuse holder on the battery positive cable, close to the terminal, fuse removed. Connect the controller battery terminals, check polarity, then insert the fuse. The controller should detect 12 V or 24 V.
Why battery first? Most charge controllers need battery voltage to set themselves up. Panels first can confuse the system voltage, and some manuals warn it can damage the controller.
Step 5: Connect the panels to the controller through the PV breaker
With the PV breaker open, wire panels to its input and its output to the controller. Uncover the panels, check voltage and polarity at the breaker, then close it and watch for charging.
Step 6: Connect the inverter through the DC breaker
Inverter off, DC breaker open, run cables from the battery to the inverter input, with the DC breaker close to the battery end. If this cable does not pass through the main battery fuse, it needs its own fuse near the battery positive. Check polarity twice; reversed polarity can destroy an inverter. Close the breaker as the manual describes.
Step 7: Add the AC breaker on the inverter output
Connect the inverter AC output to an AC breaker, kept open for now, or follow the manual for its built-in outlets.
Step 8: Connect the loads
Plug lights, fans, chargers and the fridge into the inverter outlets or a heavy-duty extension with its own protection. Fixed wiring into walls and outlets is a job for a licensed electrician.
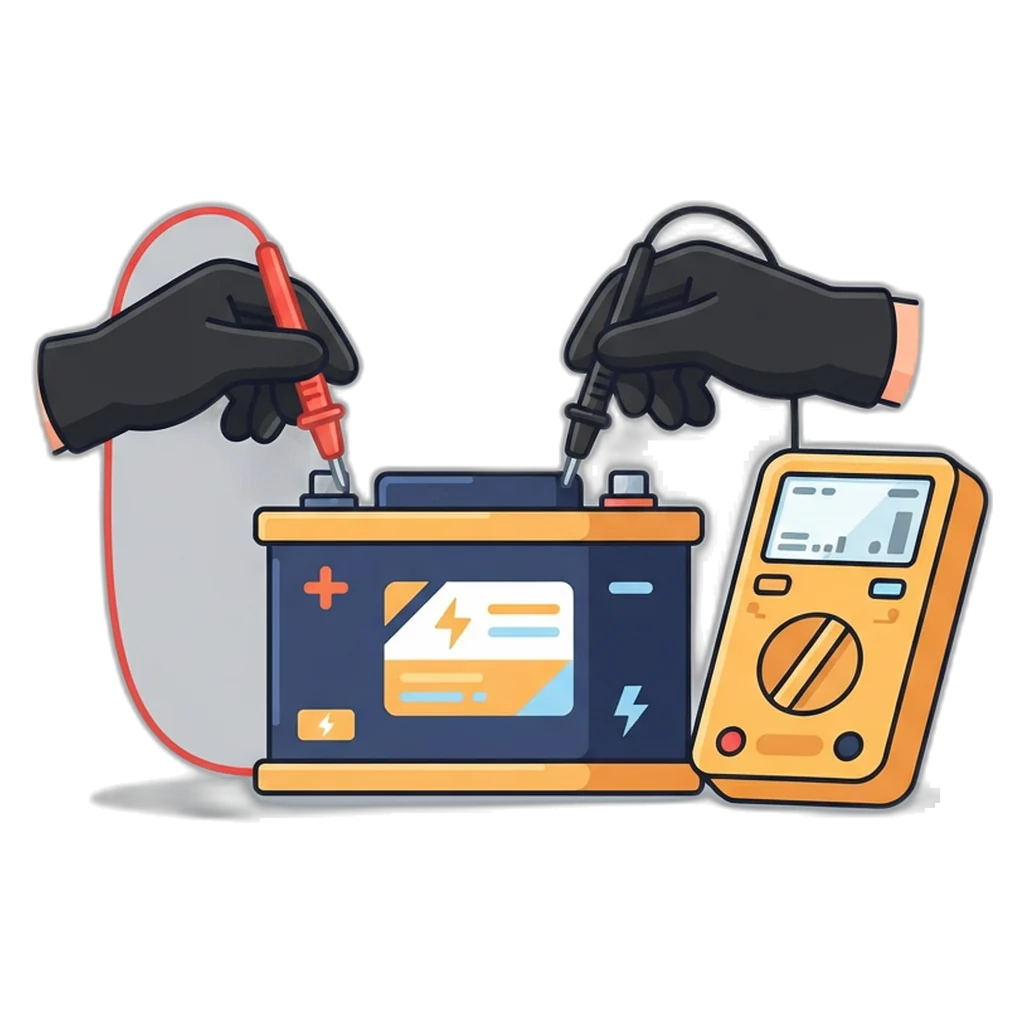
Step 9: Test everything with a multimeter
Measure battery voltage, PV voltage at the controller and inverter AC output, and compare them with the displays. Then follow the checklist below.
Fuse and breaker placement
In an off-grid solar setup, every cable from a battery or panels needs protection at the source end. Use DC-rated fuses and breakers on the DC side; AC-only breakers may not break DC current safely.
| Device | Location | Why it is there |
|---|---|---|
| Battery fuse | On the battery positive cable, as close to the terminal as practical | A battery can push a very high current into a short; the fuse prevents a cable fire |
| PV breaker (DC) | Between the panel cables and the controller PV input | Lets you switch off the panels before working on the controller |
| DC surge protector | At the PV breaker, wired to ground | Diverts lightning-induced spikes away from the controller |
| Controller output fuse or breaker | On the positive cable from the controller to the battery or busbar | Isolates the controller and protects that cable |
| DC breaker (inverter) | Between the battery or busbar and the inverter input, close to the battery end | Isolates the inverter and protects its heavy cable |
| AC breaker | On the inverter AC output | Protects the AC cable and loads from overload and shorts |
Use DC-rated devices on every DC line. Fuse and breaker sizes come from the controller, inverter and battery manuals.
Cable sizing: the principle, not a guess
Cable size depends on the current it carries and its length. Higher current and longer runs both need thicker copper, because resistance causes voltage drop: lost power, warm cables and an inverter that may shut off under load.
Use the cable maker's tables and the equipment manuals for your off-grid solar setup. Keep the battery-to-inverter run short, since it carries the most current, and use solar-rated cable outdoors. Never undersize: a thin cable is a fire risk.
Testing an off-grid solar setup: first switch-on checklist
Use this checklist for the first full switch-on, and again after any change to the wiring.
- All breakers open, inverter off, fuse removed. Check every terminal is tight.
- Measure battery voltage at its terminals; it should match the nominal 12 V or 24 V range in the manual.
- Insert the battery fuse; confirm the controller detects the right system voltage.
- Uncover panels; measure PV voltage and polarity at the PV breaker, then close it and confirm charging.
- Close the DC breaker, switch on the inverter, and measure its AC output.
- Close the AC breaker and add loads one at a time, starting small and ending with the fridge.
- After an hour, touch the cable insulation near each terminal with the back of your hand, never bare metal; anything warm needs rechecking.
Maintenance for an off-grid solar setup
Clean the panels with water and a soft brush in the early morning when dust builds up. Each month, check that terminals are tight and cool, cables are not cracked or chewed, and the controller shows normal charging.
Keep the battery area clean, dry and ventilated, and do not let it sit flat for long. Flooded lead-acid needs water checks as the maker advises. Note the battery voltage on a few mornings each month; a slow drop is an early warning.
Common mistakes to avoid
Most problems in a DIY off-grid solar setup come from this short list.
- No battery fuse, or a fuse far from the battery.
- Connecting the panels before the battery.
- Using AC-only breakers on DC lines.
- Thin cable between battery and inverter, causing heat and shutdowns.
- An inverter too small for the fridge start-up surge.
- Mixing old and new batteries, or different chemistries.
- Skipping the ground rod and frame bonding.
- Plugging the inverter into a wall outlet to "feed" the house.
When to call a licensed electrician
Call a registered master electrician or professional electrical engineer for fixed AC wiring into walls, any link to your panel board or the grid, large battery banks, or high-voltage strings, and whenever something smells, sparks or gets hot. Our hybrid solar diagram guide shows what a grid-connected system involves. The Institute of Integrated Electrical Engineers (IIEE) publishes the Philippine Electrical Code that licensed practitioners follow.
Philippine conditions and phone tips
An off-grid solar setup here must survive typhoons, heat and long rainy seasons.
- Typhoons. Use through-bolts and rated clamps, a low and sturdy rack, and secure cable runs. Follow PAGASA tropical cyclone wind signals, and inspect the rack, bolts and cables after every storm.
- Heat around the battery. Batteries and inverters age faster in heat. Keep them in shade with airflow, never under a bare iron roof or in direct afternoon sun.
- Rainy-season cloudy days. Peak sun hours are typically about 3.5 to 5 a day; check your area on the Global Solar Atlas. For wet months, add battery or panel margin, as the example did.
- Brownouts. At home, a small off-grid circuit can keep lights, fans and phones running. Keep it fully separate from house wiring unless an electrician connects it properly.
On your phone
- Screenshot the diagram and the switch-on checklist so you can read them offline at the site.
- Photograph each connection before you close a cover, so you have a record of the wiring.
- Photograph the controller and inverter settings screens after setup, in case they reset.
- Keep a simple note of battery voltage readings to spot slow problems early.
Larger all-in-one units like those from JH Solar work with or without grid power and are installed by a licensed electrician; their hybrid layout is covered in our diagrams hub. For background, see this overview of solar charge controllers.
Safety and Electrical Reminders
- Cover the panels or keep the PV breaker open whenever you touch panel or controller cables.
- Fit the battery fuse before anything else touches the battery, and remove rings and watches.
- Use only DC-rated fuses and breakers on DC lines; ratings come from the manuals.
- Never connect the inverter output to house wiring that is also on the grid.
- Keep the battery off the floor, away from water, children and heat.
Solar panels make DC power whenever light hits them, and batteries hold enough energy to start a fire if they are shorted. Work on the grid side, the AC panel board or a net-metered system belongs to a licensed electrical practitioner following the Philippine Electrical Code. Our numbers are estimates, not a design or a quote.
Frequently Asked Questions
Can I use a car battery for an off-grid solar setup?
It will work for a short test, but it is a poor long-term choice. A car battery is built to give a big burst of current to start an engine, not to be drained and recharged every day, so it wears out quickly in solar use. A deep-cycle battery, or a LiFePO4 battery with its own BMS, is made for daily cycling.
Should I build a 12 V or a 24 V system?
For very small loads such as a few lights and phone charging, 12 V is simple and parts are easy to find. Once you add a fridge, several fans or a bigger inverter, 24 V is usually the better choice: the same power flows at half the current, so cables, fuses and breakers can be smaller and run cooler. Pick the voltage before buying anything.
Can I add more panels or batteries later?
Usually yes, if you plan for it. Check that your charge controller has spare current and voltage headroom before adding panels. When adding batteries, use the same model, voltage and chemistry, and ideally the same age, because mixing old and new batteries makes them share the load unevenly. Every added battery in parallel needs its own fuse, and three or more panel strings in parallel usually need string fuses, as the panel datasheet says.
Can a small off-grid system run an aircon?
Not a small kit like the one on this page. Example: an 800 W aircon running 8 hours uses 6.4 kWh a day, almost three times the whole example load here, and its compressor needs a large start-up surge. Air conditioning on solar is better planned as a larger hybrid system, designed and installed by a licensed electrician.
Why does my inverter shut off when the fridge starts?
A fridge compressor draws a short surge when it starts, often several times its running watts. If the surge is above the inverter surge rating, or the battery voltage dips because cables are too thin or the battery is low, the inverter protects itself and shuts off. Check the surge rating, the cable size and the battery charge level.
Can I connect my off-grid inverter to house wiring that also uses Meralco power?
Not by yourself, and never by plugging it into an outlet. Feeding inverter power into wiring that is also connected to the grid can backfeed the utility line and injure a line worker during a brownout, and it can damage the inverter. A licensed electrician must install a proper transfer switch or separate circuits, following the Philippine Electrical Code.
Conclusion: build it in order, test it, keep it safe
A small off-grid solar setup is a practical way to power a nipa hut, farm or brownout corner, and the DC side is within reach of a careful DIYer. Size each part from your own loads, follow the wiring order with the battery first, put a DC-rated fuse or breaker on every line, ground everything, and test with a multimeter before you trust it.
When the job grows into fixed AC wiring, a link to your panel board, or air conditioning, hand it to a licensed electrician.
Size your off-grid system first
Enter your loads and hours to estimate the panels, battery and inverter your off-grid system needs.
Related Guides
- JH Solar HomeStart here: JH Solar systems and every guide on one page.
- Solar Setup DiagramRead any solar diagram and pick the setup that fits you.
- Solar ComputationTurn your electric bill into a system size in a few taps.
- Solar Battery GuideHow much battery you need for nights and brownouts.
- Power Station With Solar PanelPortable power stations vs a whole-home system.
- Hybrid Solar System DiagramSolar, battery and Meralco power working together.